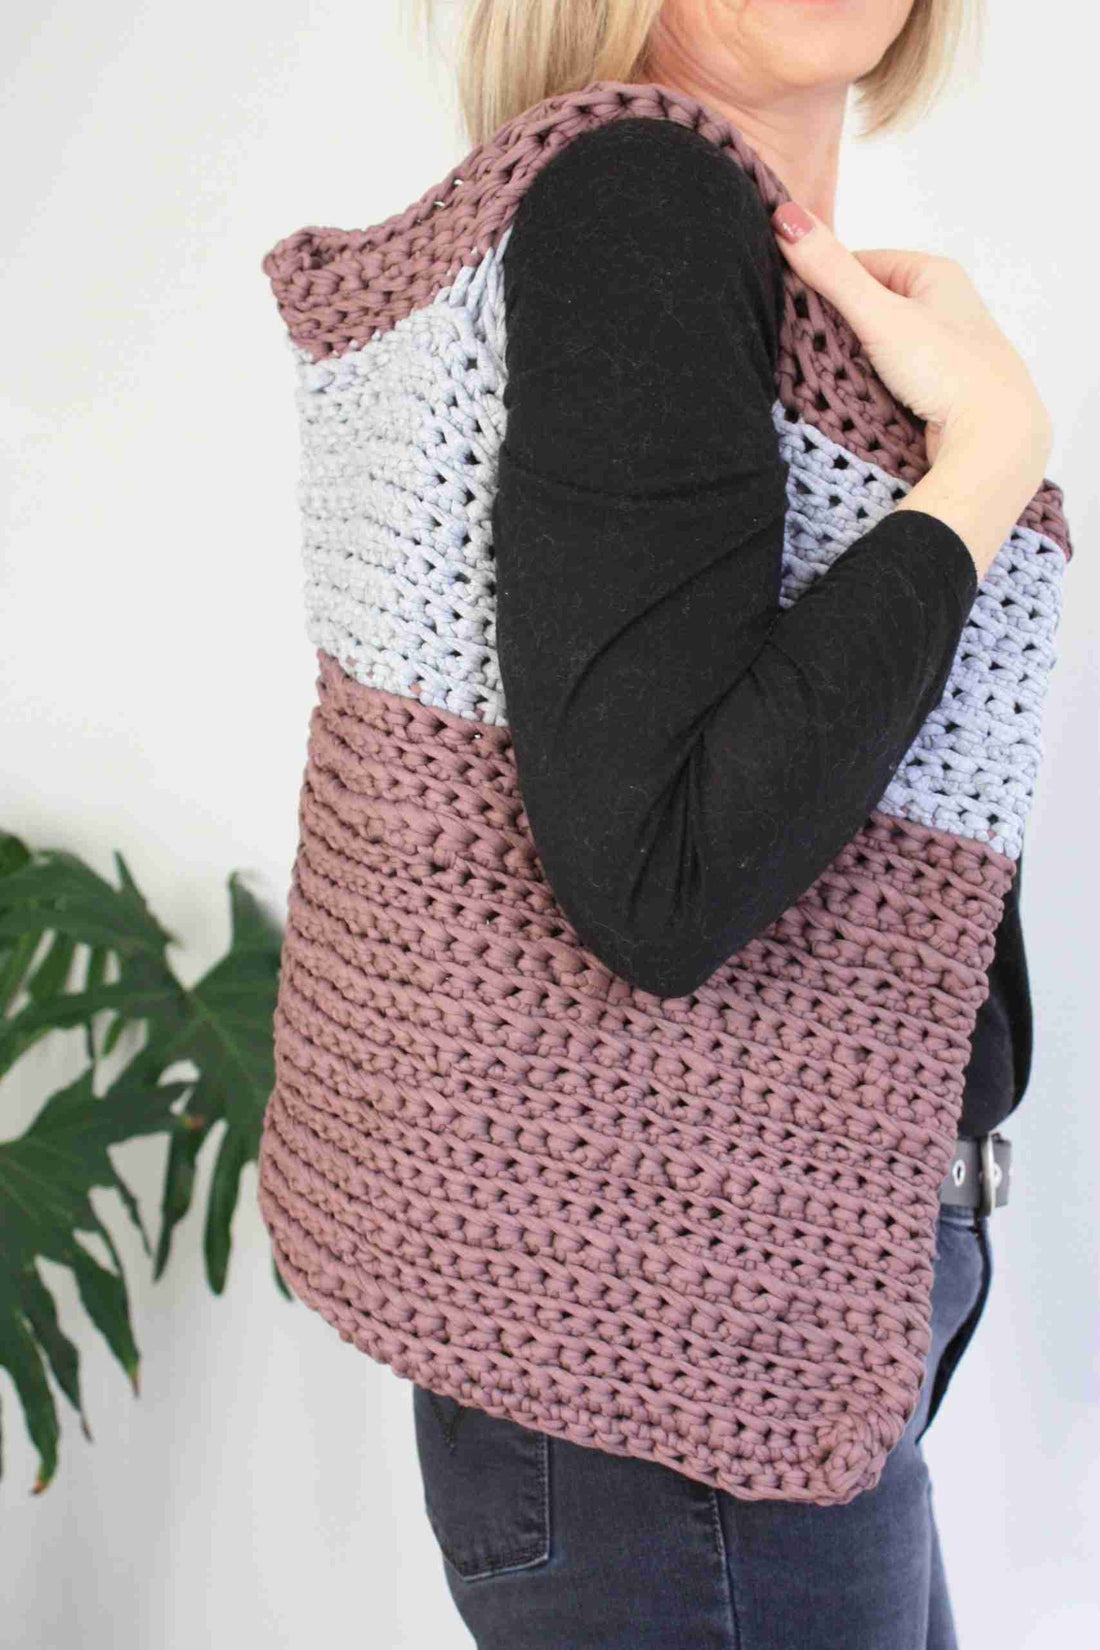
If you're hoping to make the next step from simple hats and scarf projects then this easy crochet tote bag tutorial is a great simple project for beginners.
Once you have created your base you can make your bag as deep or shallow as you like, the sturdy stitch means it's perfect for all of your groceries.
I love the large tote size as it works just as easily with a laptop and an essential crochet project as it does when it's stuffed full of beach accessories.
If you prefer to make a small bag you should grab the oversized clutch pattern here or try the boho fringed friend clutch pattern here.
The best bit is that as it's made from cotton it can be washed easily if your sun cream leaks or you drip your coffee on it - or is that just me?
No time just at the moment? Pin it for later.
Add to your Ravelry queue now for later.
What Size Is The Crochet Tote?
The bag in the images is made to 17x17inches (43x43cm) but you can choose to make yours less deep if you don't carry around as many 'essentials' as I do!

What Is The Best Yarn To Crochet My Beach Tote bag?
This step by step tutorial for your beginners crochet bag uses 800g T Shirt Yarn.
I used Hoookd Zpaghetti, available here on LoveCrafts or Amazon.
You will also need:
- 12mm (size P) hook
- Tapestry needle
- Scissors
- Measuring Tape

Do I Need A Gauge Swatch?
Gauge is important to give you an idea of whether your project will be the size you want.
It’s not a deal breaker if your gauge is not quite right for this bag but it will help to make sure your stitches aren’t too loose so your bag will hold it’s shape when it’s filled with all of your goodies.
I usually recommend making a swatch that measures at least 10 x 10 cm / 4 x 4 inches using the stitch in the pattern the gauge is given for (see below).
Test your yarn against the gauge sizing below or see your yarn information label to check the typical gauge if you want to use an alternative.
SC BLO = 8 stitches x 8 rows (10x10 cm) - see the pattern description below to help you out.
If your swatch is smaller than this you will have a smaller bag but it will be tighter and stronger - you may want to swap to a larger hook to get the size in the images.
If your swatch is larger then definitely switch to a smaller hook as the stitches will be looser and the bag will lose it's shape.
Abbreviations
Ch – Chain
SC – Single Crochet
SCFLO – Single Crochet FRONT Loop Only
Sk– Skip a stitch
Slst – Slip stitch
Pattern Notes
- Stitches are given in US terms.
- All measurements given are unblocked.
- Note that measurements are given as exact as possible. Your tension & technique might give variations in the result, but that’s what makes it unique!
How To Crochet Your Beginners Tote Bag
How To Crochet The Base Of Your Market Bag
Chain 35, SC into second Ch then each stitch until you reach the end, SC 2 stitches into the last chain. Do not turn your work (35).
Continuing around the end of the chain, SC into each stitch on the opposite side of the chain.
SC 2 stitches into the last chain, slst to the first SC (70).

You should now have an oval piece of crochet which is the base of your bag.
Now we’re going to work in continuous rounds so we don’t have an obvious join.

Ch1 then working in the round, SCFLO for twenty rows.
To SCFLO hold your work so you can see the top of the stitch, you will see there are two loops to the V that forms each stitch.
Insert your hook only into the loop closest to you, YO and pull up a loop, YO then pull through both loops.
This pushes the back loop to the outside of your work and creates a great ridged texture as you work along the row.
OPTIONAL AT ROW 21– at this point I lay the bag flat and added a second colour at the side of the bag so the join would be less obvious.
Work 10 more rows of SCFLO in either your original colour or your second colour.
If you have used a second colour to create a stripe then lay your bag flat and rejoin the original colour yarn at the side fold of the bag so the join is not as obvious.
How To Crochet Your Bag Handles
*SCFLO 12, Ch11, Sk11 then SCFLO 12*. Repeat from * to* for the other side of the bag.
Continuing to work in the round, SCFLO 12.
When you reach the chain, hold the yarn behind your work *place the hook UNDER the chain, YO and pull up a loop (wrapping the yarn around the chain), YO and pull through both loops.
This will create a rope like stitch around the chain, which is the base of your handle. Continue SC with yarn wrapped around the chain 10 more times until you reach the end of the handle*.
SCFLO 24 then repeat from * to* to create your second handle, 12 SCFLO.
The handles need to be a bit stronger so we’re going to SC in every stitch around the top of the bag to add strength and a bit of texture. Repeat this for two rows in total.

Weave in all of your ends (don’t worry, you’re almost finished, there aren’t many).
Get your phone out and send me a selfie at hello@kingandeye.co.uk or tag me on social media (@kingandeye), I love to see what you’ve all created!


